

DIY Tissue Monster Craft

* This post may contain affiliate links or sponsored content. *
Allergy season is upon us. I don’t know about your family, but mine is sneezing up a storm. Most of us have the sniffles and itchy eyes. So, we have stocked up on tissues and allergy meds! We are going through the tissues so fast, I have to pick up more every time we go to the store.
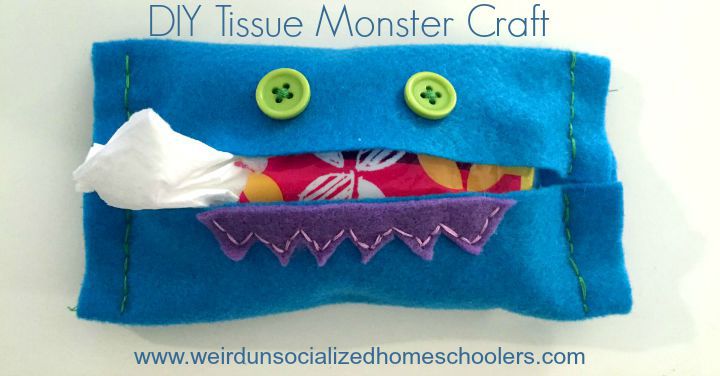
What better craft to make with my sneezy kiddo than a tissue-monster? This little monster is designed to hold little travel pack tissues. I keep these tissue packs in my purse. My daughter keeps them in her backpack and in her dance bag. And, the tissue-monsters are so easy to make!
Tissue Monster
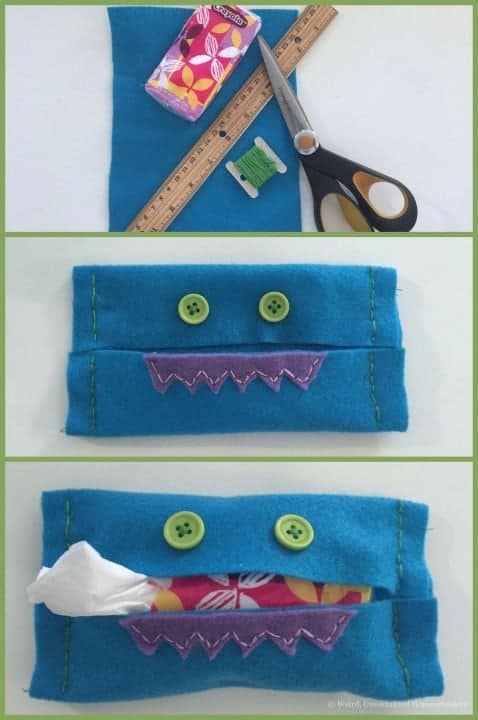
Supplies needed:
- a 6.5×6.5″ square of felt
- embroidery thread and needle
- two buttons
- felt scraps
- travel pack of tissues
What to do:
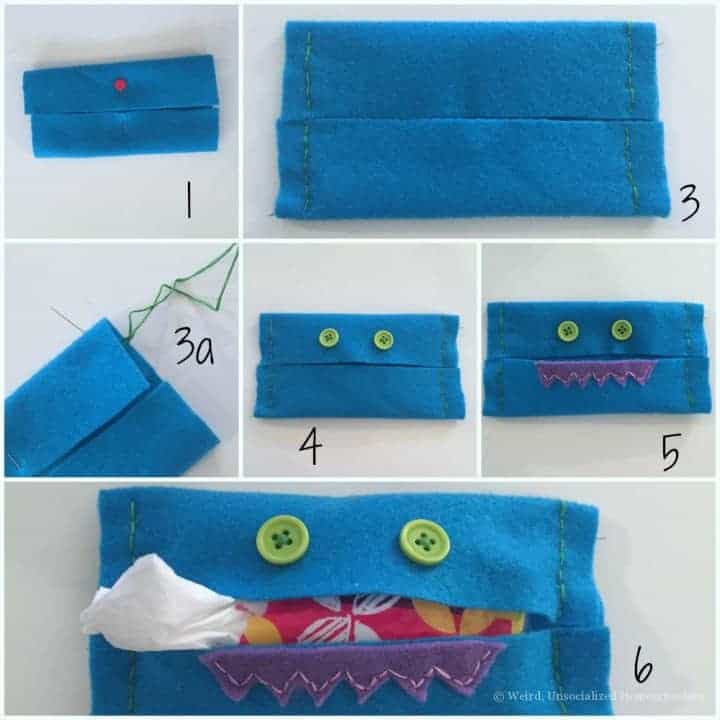
- Fold each edge of the felt until the meet in the middle. We used a straight pin to keep the sides in place for stitching.
- Cut a length of embroidery thread, and thread your needle. We used three strands of thread.
- Measure a finger-width from the outside edge, and begin stitching from top to bottom. (I had Emma slide her needle into the fold to start so the knot would be hidden.)
- Once both sides are stitched closed, sew on his/her button eyes.
- Choose a scrap of felt to make teeth. We chose to zig-zag cut our teeth, but you could scallop them, if you would like.
- Now, tuck your tissues in your little tissue-monster, and you are ready to face allergy season head on like we are!
This post is linked to the Hip Homeschool Hop.
Tara is wife to Matt and homeschool momma of three. Her children are 21, 16, and 11 – two boys and one girl. She is currently homeschooling her daughter – 6th grade. When she’s not blogging, Tara enjoys crocheting and snuggling up with a good book. She and her family recently moved from Texas to Ohio, and they’re having fun exploring their new surroundings. She blogs about homeschooling, motherhood, and family life on both of her blogs – Homeschool Preschool and Teaching with Children's Books.