How to Make a Salt Dough Map
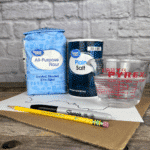
Materials
- Flour
- Salt
- Water
- Blank outline map of the country or state of your choice
- Sturdy piece of cardboard or pizza box
- Pencil
- Sharpie marker
- Tape
- Paint
Instructions
Step 1
- Print your map. I usually just search “free printable outline map of {insert country or state name.}”
- Printing on regular letter paper works fine, but sometimes it’s helpful to print a larger size, such as 11x17, so that it’s easier to capture more detail on your map. You can usually get these sizes printed at an office supply store if you don’t have the equipment to do so at home.
Step 2
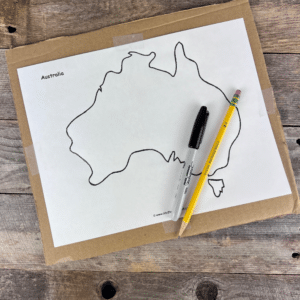
- Transfer the outline map to your piece of cardboard. First, lightly tape the outline map to your box. Then, trace the map in pencil, bearing down hard enough to make an impression of the outline on your box.
- You might want to heavily shade the entire back of your map with a lead pencil before taping it to the box. Sometimes this makes it easier to see the transferred lines once you remove the map.
- Gently lift one side to make sure you can see all of your transferred lines before removing the taped map.
Step 3
- Remove the map to reveal the transferred outline. Trace over the outline with a Sharpie marker.
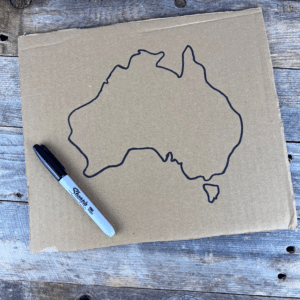
- At this point, you can lightly spray paint the cardboard if you’d like. Use blue to depict water and tan or green to indicate land. As long as you don't paint heavily, the outline will still be visible.
- Alternately, your kids may opt to paint around their country or state once the salt dough portion is completed.
Step 4
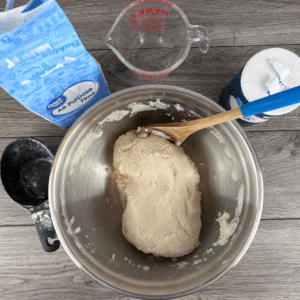
- Prepare the salt dough. In a large bowl, mix equal parts flour and salt together to make the salt dough. You’ll probably want two to four cups of dough, depending on the size of your map.
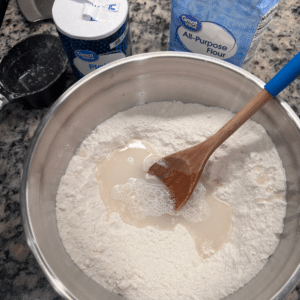
- Tip: One 26 ounce box of salt contains about two cups.
- Mix in just enough water to create a dough that is a Play-doh-like consistency. While the dough may be slightly sticky, you don’t want the dough to be wet. Because of the salt, the perfect consistency won’t be sticky like plain flour dough. Instead, it should leave more of a gritty feel on your hands rather than a sticky dough.
Step 5
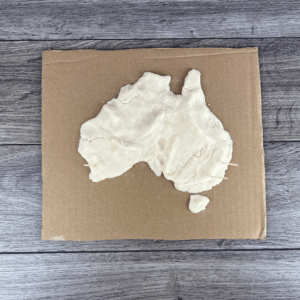
- Place the dough on your cardboard base and shape it into the outline. We found it helpful to push the dough slightly past the outline, then gently push it back with a fingertip. This helped achieve more detailed edges.
- After you’ve filled in the outline map, you can add more dough to build up areas to depict mountains and valleys, using a topographical map as a guide. You may also want to use your fingers to indent areas showing lakes or a toothpick to trace out rivers.
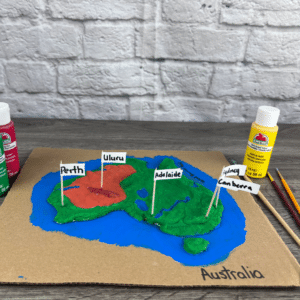
- You can also insert toothpicks or straight pins with the ball tops into areas showing the country or state’s capital, large cities, states or territories, and landmarks. After the dough dries, you can add labels to the toothpick (or pin) flags.
- While most of your map should be basically to scale, having traced a printed map as your guide, it's fun to add not-so-scaled highlights. For example, Brianna added The Leaning Tower of Pisa to our map of Italy and Mt. Fuji to Japan in years past. And I suspect that Uluru is not quite to scale in this map of Australia.
Step 6
- Let your map dry. You can either leave it in the sun for several hours or place it in the oven at 200 degrees (F). If you use the oven, be sure to supervise carefully, especially if you’re baking a painted pizza box! The dough should become hard enough that it doesn’t "give" when you press on it.
Step 7
- Paint your map (we use tempera or acrylic paint). And complete your toothpick labels. We just used address label stickers. We cut them in half lengthwise so they weren’t so big in comparison to the map. (We probably could have cut the toothpicks down smaller, as well.) Then, we wrote the city or landmark name close to the right end of the label. Finally, we folded the label around the top of the toothpick, stuck it to the empty space we’d left on the left side, and cut off any excess.
- You can also use paint or a Sharpie marker to mark the country’s physical and political boundaries, states or territories, landmarks or any other features relevant to your studies that you didn’t label with pins. (Or instead of using pins altogether.)