


DIY Tissue Monster Craft
Written by Tara Mitchell of This Sweet Life and Embark on the Journey.
Allergy season is upon us. I don’t know about your family, but mine is sneezing up a storm. Most of us have the sniffles and itchy eyes. So, we have stocked up on tissues and allergy meds! We are going through the tissues so fast, I have to pick up more every time we go to the store.
What better craft to make with my sneezy kiddo than a tissue-monster? This little monster is designed to hold little travel pack tissues. I keep these tissue packs in my purse. My daughter keeps them in her backpack and in her dance bag. And, the tissue-monsters are so easy to make!
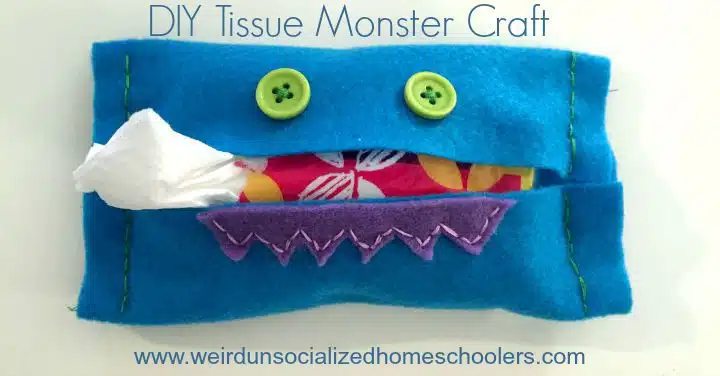
Tissue Monster
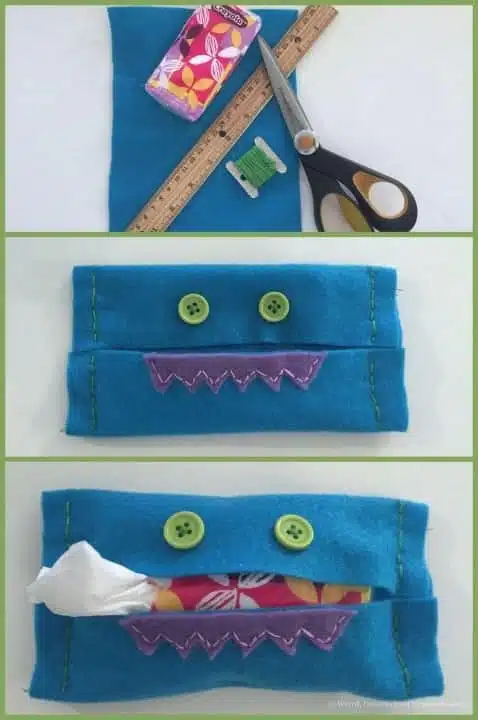
Supplies needed:
- a 6.5×6.5″ square of felt
- embroidery thread and needle
- two buttons
- felt scraps
- travel pack of tissues
What to do:

- Fold each edge of the felt until the meet in the middle. We used a straight pin to keep the sides in place for stitching.
- Cut a length of embroidery thread, and thread your needle. We used three strands of thread.
- Measure a finger-width from the outside edge, and begin stitching from top to bottom. (I had Emma slide her needle into the fold to start so the knot would be hidden.)
- Once both sides are stitched closed, sew on his/her button eyes.
- Choose a scrap of felt to make teeth. We chose to zig-zag cut our teeth, but you could scallop them, if you would like.
- Now, tuck your tissues in your little tissue-monster, and you are ready to face allergy season head on like we are!
This post is linked to the Hip Homeschool Hop.