

Roman Headpieces

* This post may contain affiliate links or sponsored content. *
We made Roman “winner’s wreath’s” on Friday as part of our study on Ancient Rome. The directions came from the book Spend a Day in Ancient Rome by Linda Honan. We didn’t follow the directions exactly since I was hoping to make headpieces sturdy enough to make it until our homeschool group’s Around the World Day in October.
I decided to hot glue the leaves to the head bands, which quickly changed the project to a “Mom project,” rather than a kid’s project…and earned me two blisters from the hot glue gun. We made three different versions, with a fourth left to make. I may make the fourth one according to the directions, since that would allow the kids to actually make the headpiece.
Supplies to Make a Roman Headpiece
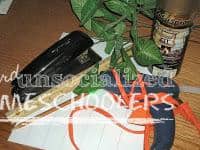
- several sheets of card stock
- scissors and/or an X-acto knife
- greenery
- gold spray paint (optional)
- a hot glue gun (optional, but necessary if you want the blisters)
- a stapler
I also used a ruler to draw evenly-spaced, straight lines on the card stock. I cut the card stock into strips and stapled them together to fit snugly around each child’s head. Then, I glued on the leaves that I’d cut from the greenery.
For the first one, I layered the leaves, going in the same direction, using two leaves at a time to give the wreath some fullness. We didn’t think it turned out looking quite authentic this way, so we did the second wreath a little different.
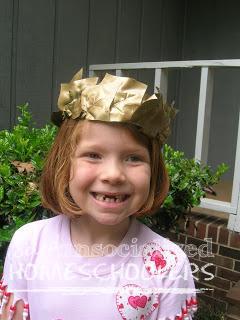
The directions in the book said to paint the wreath gold, which we did even though we typically think of them being green. Here is the finished product for wreath #1:
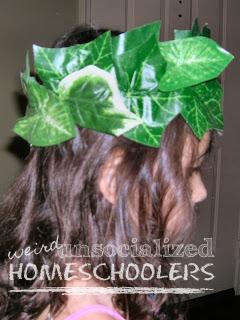
For wreath #2, we alternated the leaves, one pointing up and one pointing down, still doing two at a time to give it some fullness. We didn’t paint this one — yet! The girls like them “shiny” and “sparkly,” so we probably will. Here is the probably-not-quite-finished product for wreath #2:
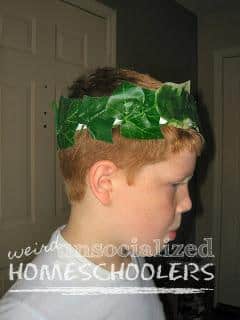
By the time I got to wreath #3, I’d already acquired one burn and managed to get the second one pretty early in the process of making #3. I was rather irritated and my two blistered fingertips hurt, so I only used a single layer of leaves, thinking that I’d either go back and add a second layer or that the white headband wouldn’t show if we decide to paint it gold. Here is wreath #3:
We have one more wreath to complete and I’m thinking that I may follow the directions on it and let Brianna do it herself. The directions call for cutting slits (which offers more opportunity for me to slice my fingers) at regular intervals around the headband, toward the middle or lower portion. Then, the kid – not the mom! – can place the stems of the leaves into the slits and tape (or glue or staple) them to the headband from the inside.
I’ll post the results when we get wreath #4 finished…if I have any fingers left to type with!
Kris Bales is a newly-retired homeschool mom and the quirky, Christ-following, painfully honest founder (and former owner) of Weird, Unsocialized Homeschoolers. She has a pretty serious addiction to sweet tea and Words with Friends. Kris and her husband of over 30 years are parents to three amazing homeschool grads. They share their home with three dogs, two cats, a ball python, a bearded dragon, and seven birds.
LOL – who’s that guy who does the tv show “Dangerous Jobs”? Maybe he should spend the day homeschooling a bunch of kids, and see how he holds up. ;P
The wreaths look great!