


Learning to Love Science: The Power of Yeast
Learning to Love Science: The Power of Yeast
Science! My favorite subject. I love doing it, teaching it, watching shows about it, reading books about it. I was born with science in my blood – literally. We all are.
Science is everywhere. It’s part of everything. You can’t escape it, which is awesome! You can even eat it! How amazing is that?! However, teaching it can be intimidating. It looks expensive. It sounds expensive. Rest assured, it doesn’t have to be either of those. My goal is for your children to start learning to love science (If they don’t already.) I’ll be sharing a series of posts to spark their curiosity and love… this is the first. Learning to Love Science: The Power of Yeast.
Today we are learning about yeast. It’s a microscopic organism that is a powerhouse. It’s a living thing you can buy in an envelope or jar in the grocery store. How crazy is that? Granted your grocery store may have live plants and live lobsters in a special section, but yeast is on an aisle with the canned and boxed foods. Ya know. The stuff that’s not considered to be alive. It doesn’t need a special place in the store. It just needs a special package, and then it can hang out anywhere. Oh, and it’s a lot cheaper than that live lobster!
All living things breathe. Some take in carbon dioxide and emit oxygen. Some take in oxygen and emit carbon dioxide. It’s a circle that sustains everyone involved. I give you this and you give me that. Working together for the greater good. Living things helping other living things.
When yeast blooms, it emits CO2 – carbon dioxide. It makes bread fluffy and light. Ever see those big holes in bread? That’s CO2. That’s yeast doing its job.
Yeast needs sugar or starches for food. You can’t survive and do your job without food. Neither can yeast. Yeast is a single-celled fungus that sleeps while in its package. Once warm water is introduced, it wakes up and does its job and feeds. Munch, munch, munch. Yum, yum, yum. Once it starts “eating,” it releases CO2. This release of CO2 causes bread to rise and be fluffy. Yeast needs food and warmth just like we do.
Technically, this is a result of fermentation. Fermentation happens when a microorganism, like yeast, is introduced. Many things are fermented, and we enjoy the by-products of the process. Items that are fermented include cheeses, yogurt, kimchi, and kombucha.
Want to do a science experiment and enjoy a wonderful, edible by-product? With a few ingredients, you can do both! We won’t be wasting the yeast because we are making bread once we see yeast “breathing” out CO2.
If you have middle schoolers or high schoolers, they can probably do all of this with supervision. Younger kids can help you do the experiment, and you can decide how much to let them do.
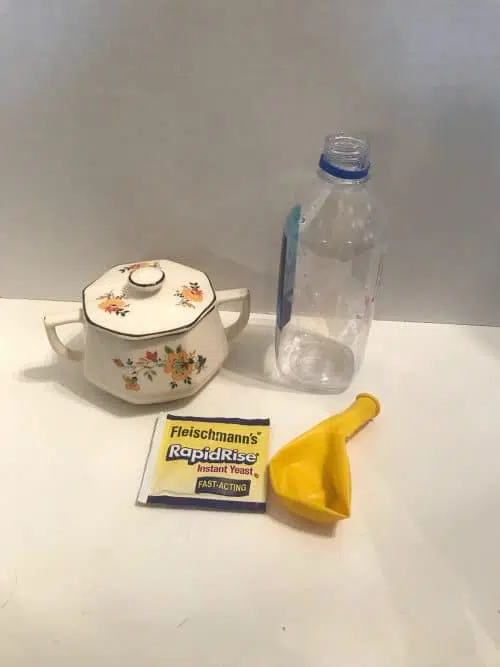
Supplies
For the experiment, you need:
- an empty clean water or soda bottle
- a balloon
- a package of yeast
- some sugar
Procedure
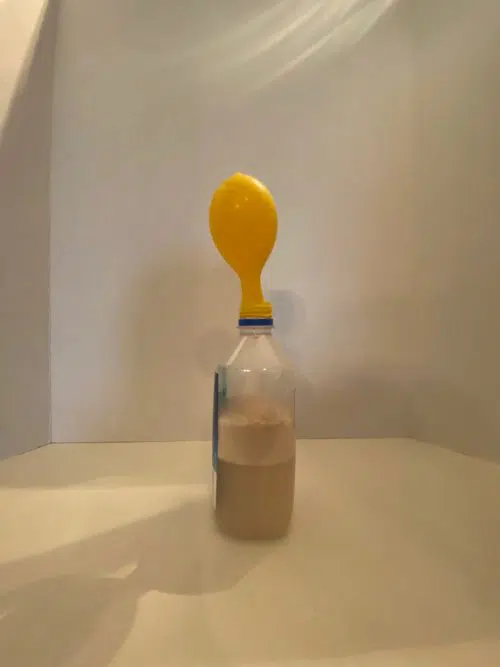
- First, stretch out your balloon. Blow it up and deflate it a few times.
- Next, fill your bottle with 1 cup of warm water.
- Add 2 tablespoons of sugar and then your yeast (1 packet or 2 1/4 teaspoons).
- Swirl your bottle around to gently mix the ingredients.
- Finally, place the balloon over the lip of the bottle so it’s sealed.
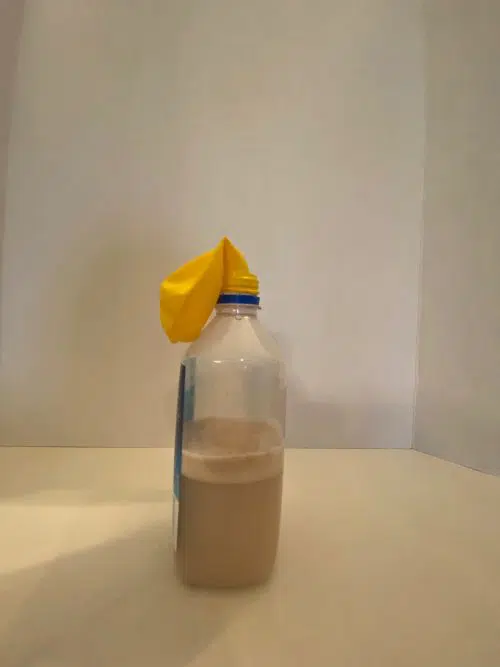
- Then all you have to do is sit back and watch!
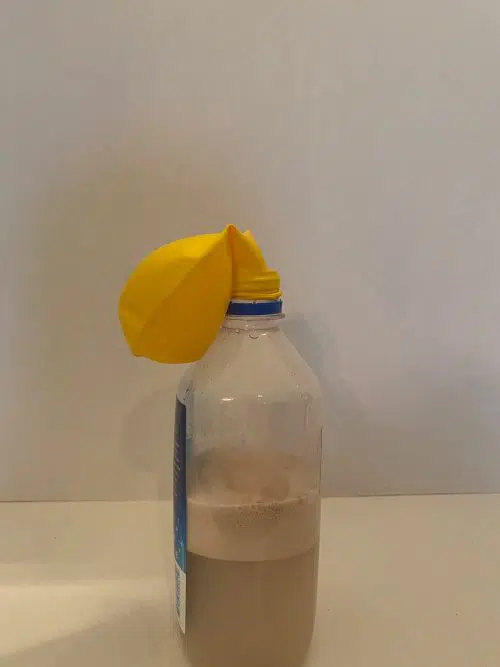
What to Look For
The yeast will froth as it “eats,” and the CO2 will blow up the balloon. It takes a few minutes, and then the balloon will fill quickly. Be patient.
What to Do Next
Now that your yeast has bloomed, let’s make something yummy with it! How about some homemade bread?
Supplies for Making Your Bread
- iron skillet or Dutch oven
- 4 1/2 cups of all purpose flour
- 1 cup of warm water
- a pinch of salt
- olive oil
- bloomed yeast mixture (from the experiment)
Procedure for Making Your Bread
- Preheat oven to 400.
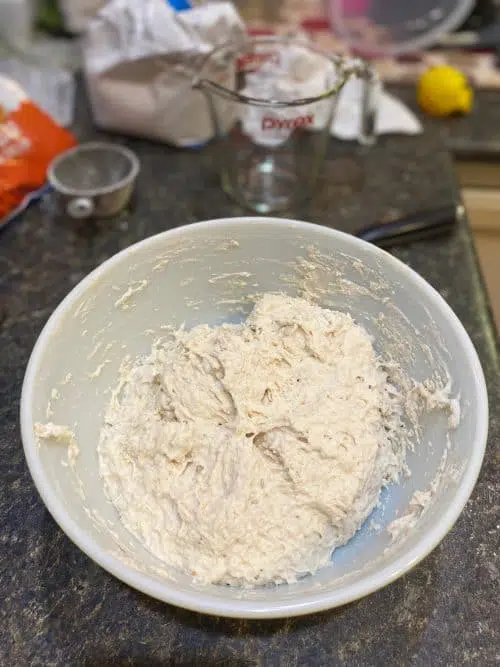
- Stir together the flour, water, bloomed yeast mixture (from the experiment), and salt in a bowl until a loose batter forms.
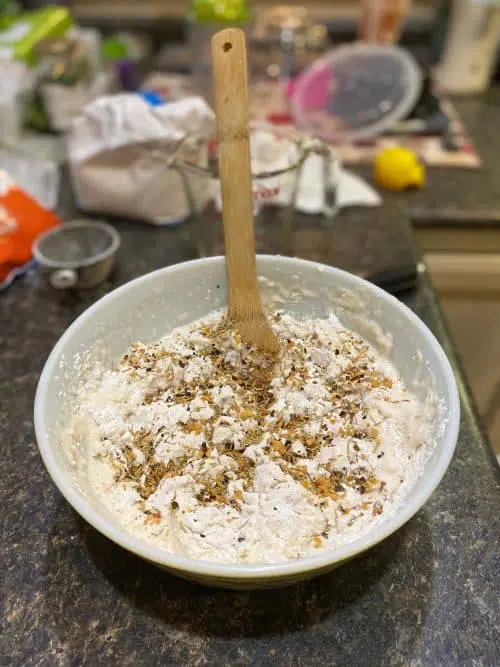
- If you want to use any add-ins (see information below), now is the time!
- Cover the bowl and let the batter rise for 45 minutes.
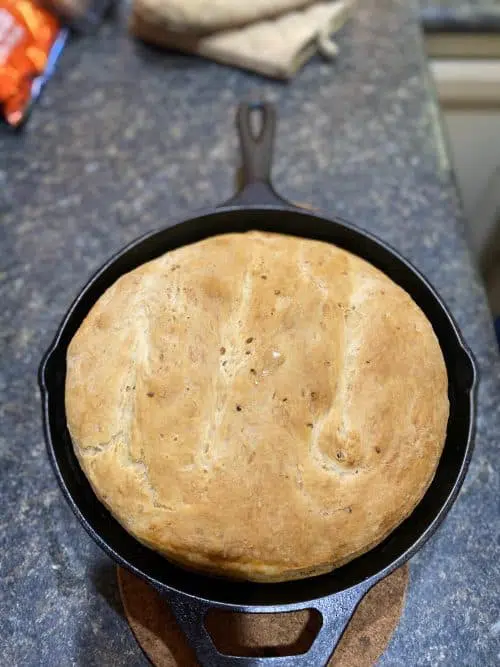
- After the batter rises, oil your iron skillet, oil your hands (Don’t skip this step or you’ll be a sticky mess!), and transfer the dough to your skillet. It will be sticky.
- Form your dough to the pan. Then cover it and let it rise for 30 more minutes.
- After the second rise has completed, cut a few slits in the top of the bread.
- Bake for 30-40 minutes.
- Enjoy!
Add-Ins
This makes a loaf of plain, crusty bread. The best part, though, is that you can flavor it. We love it with a rosemary and garlic spice blend from the spice aisle. It’s also great with garlic and cheddar cheese or with parmesan cheese. The possibilities are endless! Keep in mind that, if you want to add spices or flavors, you’ll need to add them to the flour mixture before your first rise.
Science is all around us. Sometimes we just have to stop and look!
You May Also Like:

100+ Things to Look at Under the Microscope
Edible Cell Project: Chocolate Chip Cookie Science


We also transpose recipes into teaspoons and figure out ingredient ratios. Then we figure out what percentage of the recipe is yeast!